
SOURDOUGH STARTER
REHYDRATION GUIDE
Congrats on your new sourdough starter! You’re just a few days away from baking fresh sourdough bread. Follow the instructions below to bring your dehydrated starter to life! Let’s get started.
Outlined below, you’ll find the steps and information regarding your sourdough starter:
Step 1 - Collect your supplies
Step 2 - Weigh your jar
Step 3 - Rehydrate your starter
Maintenance Feeding Instructions
Discard Information
Sourdough Starter Tips & Tricks
STEP 1 - COLLECT YOUR SUPPLIES
What you need:
Dehydrated Starter
Kitchen Scale
Glass Jar with lid
All-Purpose Flour
Water
Spatula
Paper Towels
Notes about supplies:
-All instructions in this guide are measured in grams, so you’ll need a kitchen scale. That way you can accurately feed your starter each day.
-The glass jar must have a loose lid. It needs to be loose so that it can release gasses easily. The jar should also allow your starter to rise 3-4x the initial mix level. That way it won’t overflow.
-Thinner spatulas make it easier to mix the starter down in the jar.
-Use unbleached all-purpose flour. This is the food for your starter. The flour must be unbleached, otherwise your starter will weaken over time. You also don’t need to use bread flour.
-Water can be tap water or filtered. It depends on your location and water source. Use water between 60-80F.
These are the essential supplies you’ll need for feeding your starter. If you need supplies, check out my recommended items » HERE «
STEP 2 - WEIGH YOUR JAR
What you’ll need:
Kitchen Scale
Glass Jar
(Optional - tape and marker)
First, place the empty jar (without the lid) on your kitchen scale. Read the output on the screen. Make note of the weight in grams.
I recommend writing the weight on a piece of tape and put it on the bottom or side of your jar. Do this for any of the jars that you’ll be using for your starter.
It’s important to know the weight of your jar so you’ll be able to figure out how much starter is left in the jar each time you feed it.
STEP 3 - REHYDRATE YOUR STARTER
What you’ll need:
Dehydrated starter
Kitchen Scale
Glass Jar
Flour
Water
Spatula
Paper Towels
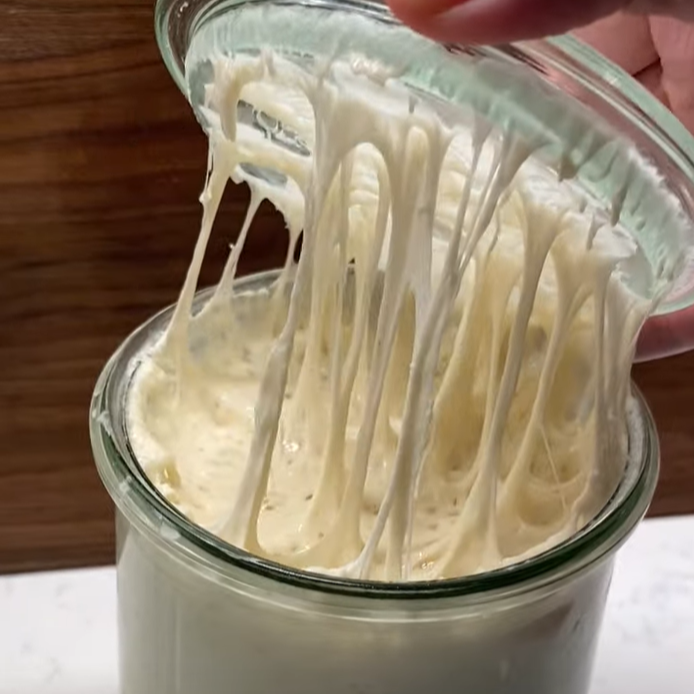
Now you’re ready to revive the dried starter. Let’s begin!
Day 1
1) Place the empty jar on the kitchen scale. Zero out the scale.
2) Pour all of the dehydrated sourdough starter into the jar. It will be approximately 10 grams.
3) Add 20 grams of water (60-80F). Mix with spatula until dry starter is submerged in water.
4) Cover with a loose lid and sit it on the counter at room temperature for 1 hour.
5) After the hour, add 10 grams of flour. Mix with the spatula until all dry flour bits are mixed in.
6) Loosely cover your jar with the lid. Place the jar on your counter at room temperature for 24 hours.
7) Use a paper towel to clean off your spatula.
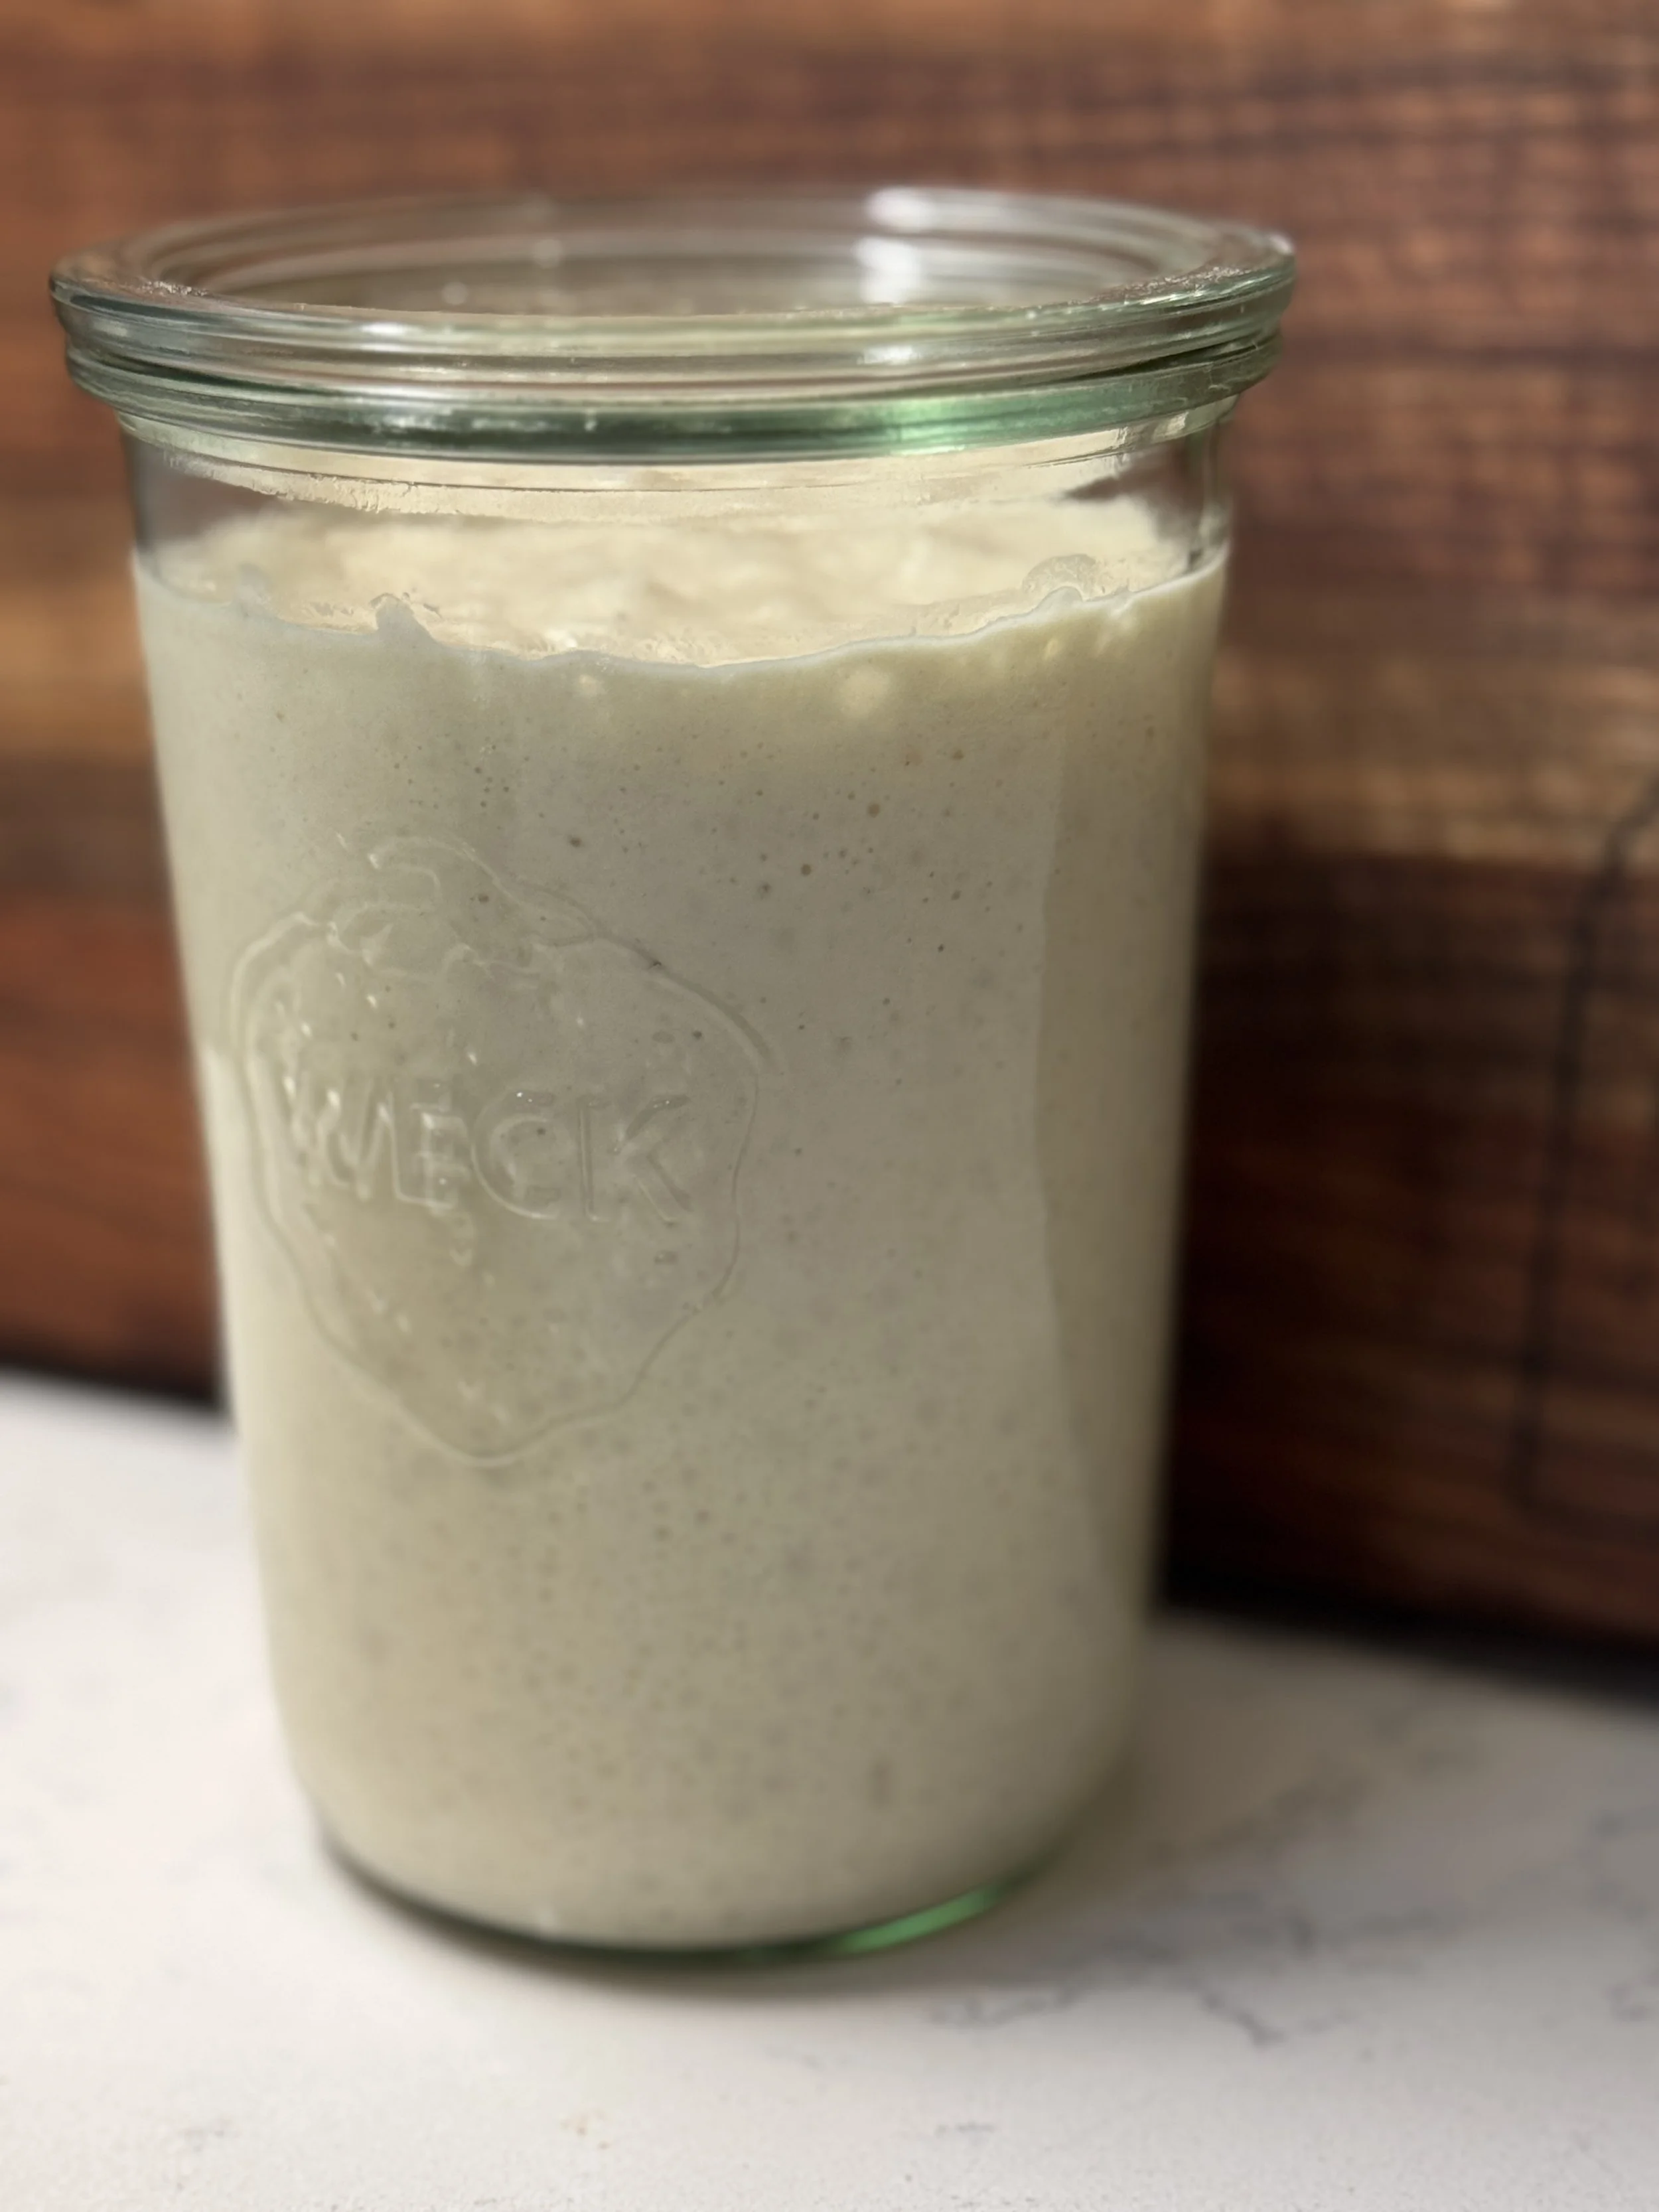
Day 2
After 24 hours you may notice the starter is much smoother, but no bubbles yet. That’s normal! Now it’s time to discard half and feed.
1) Place the jar on the kitchen scale and remove the lid. Take note of the total weight. In order to figure out how much starter is in the jar, you need to subtract the weight of the empty jar.
(total weight) - (weight of empty jar) = (total starter in jar)
2) Throw away half of the starter, which is approximately 20 grams. You should have about 20 grams of starter left in the jar.
3) Place the jar on the scale. Zero out the scale. Add 20 grams of water (60-80F). Mix with the spatula.
4) Add 20 grams of flour. Mix with spatula until all dry bits of flour are mixed in.
5) Loosely cover your jar with the lid. Place the jar on your counter at room temperature for 24 hours.
6) Use a paper towel to clean off your spatula.
Day 3-5
Now you may be seeing small bubbles on the surface of your starter! If not, you will! Continue feeding as outlined in Day 2 until you see small bubbles on the surface.
Repeat the following steps:
Discard half the starter → Feed water and flour → Mix → Cover → Rest for 24 hours
Maintenance Feeding Instructions
Once your starter is predictively bubbling, it’s time to begin a maintenance feeding schedule. This is usually around Day 5 from when you first revived it from dried starter. It’s officially an active starter that is ready for baking!
A sourdough starter works best if you feed it every day. Although this may sound daunting at first, you will soon find it is simple. It takes 2-3 minutes each day. That’s worth it for some delicious fresh bread. You can do this!
I recommend maintaining a small starter. Keeping it small is easier long term and reduces waste. Use a “high ratio feeding” for your maintenance feedings each day. I recommend doing 1:5:5 ratio. So what does that mean?
The first number is how much starter you have leftover in the jar after you discard.
The second number is how much water you add.
The third number is how much flour you add.
DAILY FEEDING EXAMPLE - You have 10 grams of starter leftover in your jar after you discard the rest. Now you’ll add 50 grams of water (60-80F) and 50 grams of flour. Now you have 110 grams of starter. The following day you have the choice to bake with your starter or discard 100 grams. (See notes below on how to discard.)
My Classic Sourdough Recipe is <HERE>
Over the next 24 hours, the starter will bubble and rise. It will typically get 3-4 times the initial mix level. When the starter is at it’s highest point in the jar, it has peaked. That’s when you want to use it for baking bread. It generally stays at peak for a few hours, so it gives you flexibility in your baking schedule. Then it will fall down to the initial mixing level.
Optional - place a rubber band at the initial level in order to monitor how much it has risen. It’s a great visual to learn how your starter behaves over a days time.
Discard is simply “inactive starter”. Once your starter has eaten through all the flour and water you gave it the day before, it will “fall” down and no longer be bubbly or airy. This is discard.
The good news is that it’s still got all the good yeast and bacteria in there! You can think of it as fermented flour. Sourdough discard is great when added to bakes for extra tang, moisture and flavor. A quick Google search will lead you to numerous recipes.
So each day you will discard most of your starter to make room for your maintenance feeding in the jar. You have 2 options for what to do with it:
Option 1 - Store discard in a sealed jar in the fridge. Each day you can add to the jar. Then you can use it for baking something later on. I don’t recommend using discard over 2 weeks old.
Option 2 - Throw it away. Some people put it in the trashcan. You can also heavily dilute it with hot water and flush it down the sink. WARNING - starter/discard hardens like concrete when it dries. DO NOT put it down the sink without heavily diluting with HOT water.
Discard Information
Sourdough Starter Tips and Tricks
Store your starter on your counter when you plan to feed it daily. Place something loosely on top. You can put fabric on top, or the provided glass top, or maybe even a towel on top. You don’t want it to be airtight! The starter needs air to stay healthy.
Need a break from feeding your starter every day? Store your starter in the fridge! The cold temps puts a “pause” on the activity in the starter. The starter will “sleep” in the fridge until you pull it out. Before you put it in the fridge, give it a good feeding. When you pull it out of the fridge and put it on the counter, it’ll rise as it comes to room temperature. It will take a couple feedings to come back to full strength after it’s been in the fridge. I don’t recommend storing in the fridge for more than 2 weeks. It works best to feed it at minimum once a week. Consider dehydrating your starter for extended leave.
The warmer your home, the more starter activity you’ll notice. My house is usually between 68-74 degrees F. If it’s much warmer, the starter is much more active and peaks sooner.
Generally, your starter will peak 6-8 hours after you feed it. You’ll use the starter at its peak for baking breads and baked goods.
A starter at its peak may also be referred as “ripe”, “active”, or “bubbly”. These all mean the same thing - your starter has reached its peak activity. There are bubbles and dimples on the top and throughout the sides. After observing your starter for a few weeks, you’ll begin to learn when this is. After peaking, the starter will “fall” down to the original height. It may be helpful to mark on the jar the height of your starter while you learn how to “read” it. You want to use it when it is at its greatest height.
Only use unbleached flour!
Try to feed it at approximately the same time every day. That way the rise and fall becomes more predictable. Modify the schedule based on your needs.
A sourdough starter can be dried out and saved for later. Just place a thin layer of your active starter on parchment paper and give it 48 hours to fully dry out. Then break it up and store it in a sealed glass jar. This is your free insurance policy! You can use it anytime in the future or give it away! Then rehydrate it with this guide - add flour and water!
Feel free to reach out on socials or by email (hollymadebakes@gmail.com) with any questions. I’m happy to help you out!
Happy Baking!
-Holly